All Crimson Desert Bosses
Detailed strategies for every boss encounter. Plan your approach before the fight.
92
Total Bosses
9
Legendary

Myurdin
Myurdin is the first main quest boss you encounter, fought at Hills of No Return in Hernand. Treat the fight as an early timing check: stay patient, avoid overcommitting into his sword-and-shield strings, and counter after he finishes a sequence.

Kailok the Hornsplitter
Kailok the Hornsplitter is the Chapter 2 main boss in Goldleaf Guildhouse, Hernand. Use Force Palm to stagger him out of his counter stance, sidestep his wind slashes, and punish only after his full combo strings finish.

Matthias
Matthias is a main quest boss encountered in City of Hernand, Hernand during Hernand in Chaos. Game8 notes that you can defeat Matthias by using his Pump Kick move against him. Key published tips include use his pump kick against him; let him attack first before you retaliate; keep your shield up to block attacks.
Reed Devil
Reed Devil is a main quest boss encountered in Frozen Soul Mountain, Hernand during The Face Behind the Mask. Game8 notes that you can defeat Reed Devil by destroying all 5 totems with Focused Shot and Charged Shot. Key published tips include destroy all 5 totems during 2nd phase; focus on parrying his swift attacks; dodge the sword waves at range.
Tenebrum
Tenebrum is a main quest boss encountered in Scholastone Institute, Hernand during Forbidden Knowledge. Game8 notes that you can defeat Tenebrum by using Force Palm while gliding mid-air. Key published tips include glide and use force palm three times.

Kearush the Slayer
Kearush the Slayer is a main quest boss encountered in Hernand Castle, Hernand during Uninvited Guest. Game8 notes that you can defeat Kearush the Slayer by using the Back Hang skill to safely deal damage. Key published tips include use back hang to deal huge damage; grapple to walls to avoid his slam attacks; play defensively during his 3rd phase.
Crowcaller
Crowcaller is a main quest boss encountered in Crow's Nest, The Abyss during Black and White. Game8 notes that you can defeat Draven the Crowcaller by using Grappling moves to stagger him. Key published tips include use grappling skills for high stagger buildup; jump to avoid his shadow dance; bring up your shield on his 3rd phase.
Cassius Morten
Cassius Morten is a main quest boss encountered in City of Calphade, Hernand during The Unyielding Shields. Game8 notes that you can defeat Cassius Morten by using Nature's Grasp on the pillars. Key published tips include use the pillars to deal huge damage; keep your distance and dodge his attacks.
Black Bear Captain
Black Bear Captain is a main quest boss encountered at Deepfog Basin in Pailune during Turning Tides. Use the quest-supplied Whistling Arrows from range and avoid getting clipped by his superarmor leap when he closes the gap.

Lava Myurdin
Lava Myurdin is the late-story rematch in Ashclaw Keep, Pailune. Use Grappling Skills during the opening phase, then lean on fire-resistant armor and disciplined dodges once the lava-infused attacks take over.

Ludvig
Ludvig is a main quest boss encountered in Pailune Castle, Pailune during Dawn. Game8 notes that you can defeat Ludvig by using Lariat to stagger him and deflecting his lightning with Nature's Snare. Key published tips include use lariat follow-up to buildup stagger; deflect with nature's snare during his 2nd phase; use blinding flash to cancel his superamor move.

One-Armed Ludvig
One-Armed Ludvig is a main quest boss encountered in Kingshield Mountain, Pailune during Twisted Fate. Game8 notes that you can defeat One-Armed Ludvig by using Oongka's Quick Grab to parry his attacks. Key published tips include use quick grab to parry for big damage; avoid his lightning sword attacks.
Lucian Bastier
A two-phase boss fight where players control Damiane instead of Kliff. Lucian Bastier is one of the longest and most demanding encounters in the game, requiring mastery of Damiane's unique combat abilities.
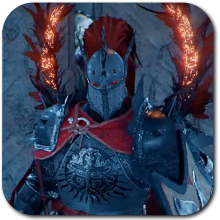
Fortain the Cursed Knight
Fortain the Cursed Knight is a main quest boss encountered at Thornbriar Fortress in Demeniss during Demeniss Bound.
Gregor the Halberd of Carnage
Gregor the Halberd of Carnage is a main quest boss encountered at Fort Ironclad in Demeniss during Ashen Steps. Dodge through the opening dash, then keep pressure on with heavy attacks before the boss can reset the pace.
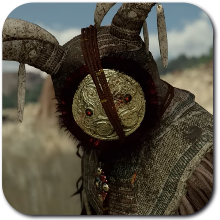
T'rukan the Ascended
A fast and hard-hitting boss with a leopard mask and fist attacks, but relatively low health.
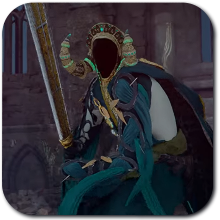
Goyen
A master swordsman who fights with a sword and shield, mirroring Kliff's own combat style. Goyen hits extremely hard — capable of defeating players in one or two strikes — and his midair kick and shockwave-creating ground smash are particularly deadly. Patience and precise dodging are essential.
Gabriel Caliburn
Gabriel Caliburn is a main-quest boss encountered at Demeniss Castle in Demeniss during Demeniss Bound. Detailed mechanics coverage is still limited, so approach it as a patience fight: hold stamina for evasive play, wait for committed attacks to finish, and treat boss-specific weaknesses as TBD until deeper routing is confirmed.
Hexe Marie
Hexe Marie is a main-quest witch boss fought at Hexe Sanctuary in Demeniss. She teleports constantly, summons adds, and punishes careless ranged play when her Dark Barrier is active, so the safest route is to manage the waves first and pressure her only after clean openings.
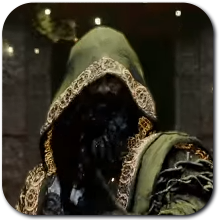
Master Du
Master Du is a main-quest boss encountered at the Cloister of Enlightenment in the Crimson Desert. The smoke-filled arena hides his instant-kill routes, so this fight is best handled by reading sound cues, preserving stamina, and punishing only after his committed lunges.
Marni's Clockwork Mantis
Marni's Clockwork Mantis is a main-quest boss encountered at Regent's Rise in Delesyia during Greater Firepower. Detailed mechanics coverage is still limited, so approach it as a patience fight: hold stamina for evasive play, wait for committed attacks to finish, and treat boss-specific weaknesses as TBD until deeper routing is confirmed.
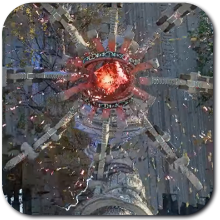
Golden Star
Golden Star is a main-quest Delesyia boss fought in aerial combat around Marni's Masterium. Stay mounted, target the exposed engine vents and chest core, and manage Wyvern stamina carefully so you can keep dodging through the projectile phases.
Corrupted Caliburn
Corrupted Caliburn opens the late-Abyss gauntlet with a long duel built around shadow-clone pressure. The safest approach is to dodge behind the real body, save healing for the later bars, and avoid greedy punishes during the clone storms.
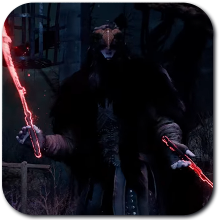
Myurdin the Avatar of Umbra
Myurdin the Avatar of Umbra is the endgame wall just before the final boss in The Abyss. A dodge-first plan is much safer than pure parry play here, especially once the red laser sequences begin and your punish windows shrink.
Umbra
Umbra is the final story boss fought entirely on Blackstar in the Umbra Abyss. Keep the fight at mid-range, break the eye's stun bar from the air, and convert each knockdown with a clean Force Palm dive instead of rushing into the lasers.

Marni's Excavatron
Marni's Excavatron is an optional mechanical boss in Karin Quarry, Hernand. Use Force Palm to stagger it for safe damage windows, then back off before the next drill or slam sequence starts.

Crimson Nightmare
Crimson Nightmare is an optional boss encountered in Fort Perwin, Hernand during Continuing Concern. Game8 notes that you can defeat Crimson Nightmare by using Focused Repulsion to knock it down and damage the cube. Key published tips include clear the enemy mobs first; equip the scarlet blades gas mask.

Saigord the Staglord
Saigord the Staglord is an optional boss in the Icemoor Castle Ruins of Hernand. Stagger him with Force Palm, interrupt his Turning Slash Expertise follow-up when possible, and reset before he starts another rush sequence.
Antumbra's Sword
Antumbra's Sword is an optional boss encountered in Sanctum of Absolution, Hernand during Cloister of Ruination. Game8 notes that you can defeat Antumbra's Sword by using Blinding Flash to cancel his attacks. Key published tips include use blinding flash to cancel his attacks; dodge the triple illusion strike; use stab to inflicting bleed.
Priscus the Ancient
Priscus the Ancient is a Legendary optional boss in the Spire of Ringing Truth, Pailune. Ground him with Sleep Arrows or Nature's Snare Retribution, then unload your heaviest melee damage during the short knockdown windows.
Abyss Kutum
Abyss Kutum is an optional boss encountered in Twisted Thicketway, The Abyss. Game8 notes that you can defeat Abyss Kutum by using Focused Shot to knock down the eye. Key published tips include use focused shot to knock down the eye.

Ogre
Ogre is an optional boss encountered in Desolate Megalith Altar, The Crimson Desert. Game8 notes that you can defeat Ogre by attacking after his combos. Key published tips include attack after his combos; stay close for easier dodge timings; be careful when using back hang.
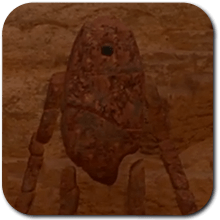
Crookrock Walker
Crookrock Walker is an optional boss encountered in Forebearer's Barrens, The Crimson Desert. Game8 notes that you can defeat Crookrock Walker by remaining at its flank. Key published tips include keep attacking from its flank.
Desert Marauder Rusten
Desert Marauder Rusten is an optional boss encountered in Forebearer's Barrens, The Crimson Desert. Game8 notes that you can defeat Desert Marauder Rusten by using Nature's Snare Retribution. Key published tips include use nature's snare retribution to destroy its wheels.
Queen Spider
Queen Spider is an optional boss encountered in Arboria Castle, Hernand during Queen of the Silkspun Citadel. Game8 notes that you can defeat Queen Spider by using Nature's Retribution to deflect her poison projectiles. Key published tips include use nature's retribution on her poison projectiles; focus on queen spider and ignore the spider minions.

Walter Lanford
Walter Lanford is an optional boss encountered in Fort Warspike, Hernand. Game8 notes that you can defeat Walter Lanford by using Nature's Snare Retribution on his shotgun attacks. Key published tips include use nature's snare retribution on his shotgun attacks.
Hemon Beindel
Hemon Beindel is an optional boss encountered at Fort Hellwood in Hernand during Reliquary of Saint Senia.
Queen Stoneback Crab
Queen Stoneback Crab is an optional boss encountered at Stoneback Crab Wetlands in Delesyia during The Queen's Lake. Strip the ore from its back with Force Palm, climb on, and stab the green weak points before finishing the exposed core.
Black Fang
Black Fang is a powerful wolf boss encountered during the Legendary Wolf questline in the Forest of Wolves. You must complete multiple Hernand faction quests from Houses Celeste, Roberts, Serkis, Alfonso, the Fishermen's Guild, and the Parish of Solomon before unlocking this encounter. Use Nature's Grasp on the trees in the arena to deal massive damage — a single environmental hit can remove over half of Black Fang's health.
Muskan
Muskan is an optional boss encountered at The Bonepit in The Crimson Desert during Emperor of the Bonepit. Let the superarmor strings finish, then answer with compact combos instead of trying to interrupt head-on.
Cubewalker Lithus
Cubewalker Lithus is an optional boss found at the Southern Quarry during the Embers of Return questline (A Rumor in the Southern Quarry). Its cube head is the primary weak point — use Axiom Force to create damage openings. Deflect its rock projectiles with Nature's Retribution to stagger the boss for extended punish windows.
White Bearclaw
White Bearclaw is a bear boss encountered during the Shadows of Beasts faction quest for the Pailune Militia at Vat'nholl Fortress. Its attacks are projected forward, making repositioning behind the boss the key strategy. Dodge through its jumping ice attacks, positioning between ice shards on landing.
White Bear of the High Mountains
White Bear of the High Mountains is a massive bear boss encountered at Fort Askelund during The Unending Threat of the Black Bears faction quest for the Pailune Militia. Keep distance and attack only after its combo strings end. Its powerful spin attacks deal heavy damage and should be avoided rather than parried.
Crimson Warden
Crimson Warden is an optional boss found at the Demeniss Wildlife Park during the Corrupted Greymane faction quest for House Thorel. She fights with a bow, repositioning frequently. Use Nature's Snare Retribution to counter her key ranged attacks. The Evasive Shot skill unlocks during this fight.
Gwen Kraber
Gwen Kraber is an optional boss encountered at The Eldertree in Hernand during The Eldertree. Dodge through the opening dash, then keep pressure on with heavy attacks before the boss can reset the pace.
Antumbra's Spear
Antumbra's Spear is an optional boss encountered at Sanctum of Revelation in Demeniss during Cloister of Ruination. Use Aerial Force Palm to rise over the arena-wide summons, then dive back in with a gap-closing punish when the boss is exposed.
Antumbra's Staff
Antumbra's Staff is an optional boss encountered at Sanctum of Solace in Pailune during Cloister of Ruination. Reflect his projectile volleys back at him with Nature's Retribution, then punish the recovery after his teleports.
Tristan the Flame Knight
Tristan the Flame Knight is an optional boss encountered at Flame Knights Castle in Demeniss during Flame Knights. Use Force Palm between combos to build stagger quickly, then punish after the boss commits to a large attack.
Keglord Garnier Mk. XXIII
Keglord Garnier Mk. XXIII is an optional boss encountered at Laughing Marionette in Demeniss during Midnight Circus. Deflect the incoming rockets to build stagger on the weak points, then rush in and pierce the exposed core after each knockdown.
Ator, Archon of Antumbra
Ator, Archon of Antumbra is an optional boss encountered at Cloister of Ruination in Pailune during Cloister of Ruination. Reflect the orb volleys with Nature's Retribution so you can build stagger without giving up your positioning.
Beloth the Darksworn
Beloth the Darksworn is an optional boss encountered at Hoenmark Ruins in Hernand during White Blizzard. Bring strong ice resistance before entering the arena so the frozen terrain and frost attacks do not lock you down.
The Forgotten General
The Forgotten General is an optional boss encountered at The General's Tomb in Pailune during Slumbering Soul. Use Aerial Force Palm to rise over the arena-wide summons, then dive back in with a gap-closing punish when the boss is exposed.
Sir Catfish
Sir Catfish is an optional boss encountered at Vallua in Hernand during Beyond the Silent Waves. Fight from the flank and stay away from bubbling water patches so the arena hazards do not drag the duel out.
White Horn
White Horn is an optional boss encountered at White Mountains in Pailune during Soul Shepherd. Fire damage can knock it into a vulnerable state, creating a clean window for extra hits.
Titan
Titan is an optional boss encountered at Windsong Peaks in Pailune during Master of Thunder. Stack lightning resistance, watch the thunder zones around the arena, and only commit when the giant hand slam leaves an opening.
One-Eyed Jackal Captain
One-Eyed Jackal Captain is an optional boss encountered at Skallcove in Pailune during Where Lightning Strikes. Ignore the endlessly respawning adds and burst down the captain instead, since the encounter ends once he falls.
Tarandus the Ashen
Tarandus the Ashen is an optional boss encountered at Odeck in Pailune during Executioner of Justice. Give the greathammer swings room to finish, then punish from the side or behind after the combo ends.
Moren the Mistwood Huntmaster
Moren the Mistwood Huntmaster is an optional boss encountered at Ridgehunter Tannery in Pailune during Bright Longleaf Forest. Knock him off his mount with Turning Slash first, then fight him on foot by working around his flanks.
Ice Walker
Ice Walker is an optional boss encountered at Everfrost in Hernand. Pull the exposed power core twice, break the scattered rocks, and separate the two walkers so you only handle one aggro at a time.
Karanda
Karanda is a giant harpy that is found in Pailune. To fight it, you will first need to complete most of the initial Faction Quests in the Pailune Militia category (24/27). Once you’ve done this, you will automatically obtain the quest Queen of the Skies , at the same time as receiving another boss related quest Hunting Red. Queen of the Skies points you directly to the location Harpy Nest on top of the mountain in the middle of Pailune. Make your way there to find the boss, along with a large group of smaller harpies. Karanda will fly around the top of the mountain, shooting ranged attacks at you, then dive at you and hover around the platform for a bit. You can try to shoot it with ranged attacks while it is flying, or just dodge its attacks and wait for it to fly at you, then attack it with melee before it moves. It doesn’t have a ton of health, so you can aim and shoot at it with arrows when it isn’t moving to deal damage. You can ignore the other smaller harpies, they don’t really do anything during the fight, and will all disappear once you defeat the boss. Once you drain its single health bar it flies away, and you are awarded with Eye of the Sky (gives all knowledge in Tribal State of Pailune category), 1x Pillar of Wind, and 1x Infinite Arrows II.
New Moon Reaper
New Moon Reaper is an optional boss found at Southern Court in Demeniss during Lunar Judgement. Detailed mechanics coverage is still limited, so prioritize safe punishes after heavy telegraphs, keep healing stocked, and treat confirmed weaknesses as TBD for now.
Half Moon Reaper
Half Moon Reaper is an optional boss found at Western Court in Demeniss during Lunar Judgement. Detailed mechanics coverage is still limited, so prioritize safe punishes after heavy telegraphs, keep healing stocked, and treat confirmed weaknesses as TBD for now.
Full Moon Reaper
Full Moon Reaper is an optional boss found at Eastern Court in Demeniss during Lunar Judgement. Detailed mechanics coverage is still limited, so prioritize safe punishes after heavy telegraphs, keep healing stocked, and treat confirmed weaknesses as TBD for now.
Grave Walker
Grave Walker is an optional boss found at Silent Falls Hideout in Hernand. Detailed mechanics coverage is still limited, so prioritize safe punishes after heavy telegraphs, keep healing stocked, and treat confirmed weaknesses as TBD for now.
Praevus the Ancient
Praevus the Ancient is an optional boss found at Fallen Abyss in The Crimson Desert during Praevus the Ancient. Detailed mechanics coverage is still limited, so prioritize safe punishes after heavy telegraphs, keep healing stocked, and treat confirmed weaknesses as TBD for now.
Primus the Ancient
Primus the Ancient is an optional boss found at Arrowhead Rock in Delesyia during Primus the Ancient. Detailed mechanics coverage is still limited, so prioritize safe punishes after heavy telegraphs, keep healing stocked, and treat confirmed weaknesses as TBD for now.
Mudwalker Lutemir
Mudwalker Lutemir is an optional boss found at Swamp of Despair in Pailune during Forest Drowned in Mud. Detailed mechanics coverage is still limited, so prioritize safe punishes after heavy telegraphs, keep healing stocked, and treat confirmed weaknesses as TBD for now.
Marni's Machina Knight
Marni's Machina Knight is an optional boss found at Marni's Outpost in Delesyia during Abandoned Trade Route. Detailed mechanics coverage is still limited, so prioritize safe punishes after heavy telegraphs, keep healing stocked, and treat confirmed weaknesses as TBD for now.
Queen Bismuth Oreback Crab
The Queen Bismuth Oreback Crab is a giant Oreback Crab that is found in the Crimson Desert Region. To defeat the Oreback Crab, you need to get on its back, same as the Queen Oreback Crab.
Aeserion the Great Serpent
Aeserion the Great Serpent is an optional Delesyia boss hidden at Serpent Shrine. Current public guides frame it as a large elemental hazard fight where staying mobile, respecting the lightning zones, and striking the glowing nodes are the safest recurring patterns.
Balthazar the Wyvernflame
Balthazar the Wyvernflame is an optional boss found at Fort Windridge in Delesyia during The Wyvernflames. Detailed mechanics coverage is still limited, so prioritize safe punishes after heavy telegraphs, keep healing stocked, and treat confirmed weaknesses as TBD for now.
Bradie Gu
Bradie Gu is an optional boss found at Bloodsteel in Pailune during Deathchime. Detailed mechanics coverage is still limited, so prioritize safe punishes after heavy telegraphs, keep healing stocked, and treat confirmed weaknesses as TBD for now.
Clockwork White Horn
Clockwork White Horn is an optional boss found at Clockwork Heart in The Abyss during Eternal Corridor. Detailed mechanics coverage is still limited, so prioritize safe punishes after heavy telegraphs, keep healing stocked, and treat confirmed weaknesses as TBD for now.
Giath
Giath is an optional boss found at Drakesfall Castle in Hernand during Masked Hunter. Detailed mechanics coverage is still limited, so prioritize safe punishes after heavy telegraphs, keep healing stocked, and treat confirmed weaknesses as TBD for now.
Gristle the Sandfang Marauder
Gristle the Sandfang Marauder is an optional boss found at Howlsands Camp in The Crimson Desert during Outlaws of the Desert. Detailed mechanics coverage is still limited, so prioritize safe punishes after heavy telegraphs, keep healing stocked, and treat confirmed weaknesses as TBD for now.
Ironwing REN-X
Ironwing REN-X is an optional boss found at The Great Ocean of Pywell in Delesyia during Wings Across the Sky. Detailed mechanics coverage is still limited, so prioritize safe punishes after heavy telegraphs, keep healing stocked, and treat confirmed weaknesses as TBD for now.
Mazzul the Dark Justiciar
Mazzul the Dark Justiciar is an optional boss found at Burnhand Quarry in Demeniss during The Dark Justiciar. Detailed mechanics coverage is still limited, so prioritize safe punishes after heavy telegraphs, keep healing stocked, and treat confirmed weaknesses as TBD for now.
Mechanicus
Mechanicus is an optional boss found at Marni's Steel Factory in Delesyia. Detailed mechanics coverage is still limited, so prioritize safe punishes after heavy telegraphs, keep healing stocked, and treat confirmed weaknesses as TBD for now.
Merrick the Knight of Fortune
Merrick the Knight of Fortune is an optional boss found at Crimson Mountains Fortress in The Crimson Desert. Detailed mechanics coverage is still limited, so prioritize safe punishes after heavy telegraphs, keep healing stocked, and treat confirmed weaknesses as TBD for now.
Samara the Sandwatcher
Samara the Sandwatcher is an optional boss found at Izvatu Fortress in The Crimson Desert during Bullets Piercing the Sandstorm. Detailed mechanics coverage is still limited, so prioritize safe punishes after heavy telegraphs, keep healing stocked, and treat confirmed weaknesses as TBD for now.
Sizlek the Insatiable
Sizlek the Insatiable is an optional boss found at Ruined Chapel in Hernand during Ruined Chapel. Detailed mechanics coverage is still limited, so prioritize safe punishes after heavy telegraphs, keep healing stocked, and treat confirmed weaknesses as TBD for now.
Skull Knight
Skull Knight is an optional boss found at Eye of Ice in Demeniss. Detailed mechanics coverage is still limited, so prioritize safe punishes after heavy telegraphs, keep healing stocked, and treat confirmed weaknesses as TBD for now.
The Masked Liberator
The Masked Liberator is an optional boss found at Fort Manub in The Crimson Desert during The Master of Masks. Detailed mechanics coverage is still limited, so prioritize safe punishes after heavy telegraphs, keep healing stocked, and treat confirmed weaknesses as TBD for now.
The Raging Tempest
The Raging Tempest is an optional boss found at Demeniss Port in Demeniss during The Day the Moonlight Waned. Detailed mechanics coverage is still limited, so prioritize safe punishes after heavy telegraphs, keep healing stocked, and treat confirmed weaknesses as TBD for now.
Skevald the Carrion King
Skevald, the Carrion King is a hyena that is found in the Crimson Desert. To fight it, you first need to pick up a bounty notice located in Tashkalp Town (Tommaso) and read it. This will then give you the Faction Quest Skevald , the Carrion King in the Crimson Desert > Lords of Unclaimed Lands section. This will then mark the quest location at the Hyena Den which is southeast of the Tashkalp town. You will likely need to use your lantern as prompted by the game to follow the tracks, as the boss and its pack of hyenas will walk around the area in a loop.
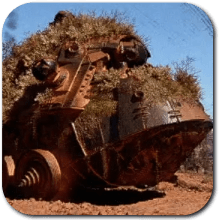
Thunder Tank
Thunder Tank is a fortress boss encountered during Fortress Keys in Delesyia. Stay at long range to bait missile barrages, then use Nature's Snare or Nature's Retribution to reflect the projectiles instead of brawling with its ram attacks.
Storm Crusher
Storm Crusher is the second fortress tank fought during Fortress Keys. Reflect rockets from range until the upper armor falls away, then punish the exposed weak point without relying on risky climbing attempts.
Dreadnought
Dreadnought is the third fortress boss in the Fortress Keys sequence. Circle constantly to avoid its yellow eye laser, punish after heavy melee whiffs, and keep stamina ready instead of trading from the front.
Cloud Fortress Orbian
Cloud Fortress Orbian is a late-story fortress encounter that starts with a dragon-mounted outer-core sequence and ends with an exposed-core ranged fight. Destroy the rotating exterior cores first, then use Charged Shot and reflected projectiles to break the final core's stun bar.
Stonewalker Antiquum
Stonewalker Antiquum is an optional boss listed by Game8 at the Gate of Truth during Guardian of the Ancient Ruins. Detailed attack coverage is still TBD, so approach with conservative punish windows and treat confirmed weaknesses as unknown for now.
Ravok of the Savage Fangs
Ravok of the Savage Fangs is an optional boss listed by Game8 in Tashkalp during Savage Fang. It is also tied to the Rock Tusk Warthog mount unlock route, so confirm the drop before leaving the area.
Kutum
Kutum is an optional boss listed by Game8 at Kingshield Dig Site during Trembles From Below. Detailed mechanics and weaknesses are still TBD, but the confirmed rewards make it worth tracking in the boss database.