Hernand Region Exploration Guide: What to Do Next
Choose your next Hernand route by story progress: town and bell, available commissions, Howling Hill, Scholastone, and optional quest detours.
If you are still in Hernand, build a useful town-and-camp loop before chasing distant map icons: progress the active tavern objective, ring the town bell, activate a return point, and choose one available local task. When the story reaches Howling Hill, prioritize rebuilding; when it sends you to Scholastone, prepare the required outfit. The route below tells you what to do at each of those stages.
Quick choice: new arrival → Hernand town; bags full → local commissions and storage; Chapter 3 rebuilding → Howling Hill; academy objective → Scholastone; optional exploration → detours with prerequisites.
Evidence and version: reviewed October 3, 2026, against the latest official 2.03.02 notice and the original walkthroughs linked below. Those route records were published in March–April, with some updated in August; they are not a new 2.03.02 playthrough. Follow the named condition shown in your save where availability differs. The order here is a suggested plan for reducing repeated trips.
How to Reach Hernand
Continue the prologue until New Journey leads into the Chapter 1 quest Where Rumors Gather. Its town objective is to enter Hernand Tavern and try arm wrestling. Finish that introduction before turning a distant side marker into your main destination. Original Chapter 1 walkthrough.
Hernand Region Exploration Guide
Choose the row that matches your current progress. A chapter label identifies a story waypoint; the named objective is the more useful availability check.
| Your situation | Next stop | Action / condition |
|---|---|---|
| Just arrived in Chapter 1 | Hernand Tavern, then town clocktower | Finish the tavern objective; climb and ring the northern bell |
| Repeatedly walking back to town | Nearby Abyss Nexus | Find the floor plate, stand on it and confirm a usable blue map icon |
| Need a short town task | Hernand notice board | Use a visible Delkin or Dahlia poster; follow the local loop below |
| Chapter 3: Old Friend is active | Alley behind Hernand's inn | Meet Marius, then continue the rebuilding chain |
| Chapter 4: Scholastone is active | Institute approach | After The Words of Alustin, obtain and wear the Scholastone Uniform for the guide interaction |
| Want an optional combat detour | Karin Quarry | Pursue the House Roberts Stolen Quarry objective when it is available |
| Want a farther faction route | Pororin or Vellua | Use the prerequisite checklist below before traveling |
The town, camp and academy steps come from the original tavern, Old Friend and Scholastone walkthroughs. Nexus activation is described in the original fast-travel guide.
Key Locations
Hernand Town and Howling Hill
City of Hernand
Use the town as a return stop: finish the active story interaction, ring the clocktower bell in the northern part of town, then activate a convenient Nexus. Ringing a bell reveals map terrain; a fast-travel point still needs activation. Original bell route.
At a Nexus, look for the round floor plate and stand on it until it activates. Confirm that you can select its blue map icon before leaving. The original guide uses Guiding Light to help find a plate in a search area; a white question mark can also represent another kind of exploration challenge. Original Nexus walkthrough.
Local Commission Loop
When the relevant poster is actually on the Hernand notice board, one of these short errands can fit into a town return:
| Available poster | Route | Finish check |
|---|---|---|
| Delkin's Request | Talk to Delkin at the grocer → buy the requested Grain Jar at the Provisioner's Shop → return to Delkin | Hand over the jar |
| Dahlia's Request | Talk to the innkeeper → find the debtor at the gate of the northern stables → return to Dahlia | Hand over the tab |
These are the author's original Delkin and Dahlia routes. Delkin's record was made at the start of Chapter 4; that observation does not prove a universal earliest unlock. Inspect your reward preview and item requirements before buying anything.
If several posters or faction tasks are available, use the side-quest selection guide to choose between a short town errand, camp work and a longer faction chain before leaving Hernand.
Keep Hernand Commissions and Greymane Commissions separate. The author's original quest index groups them separately. Choose an available town poster or camp request with a reward you want, then check that it actually completed.
If space is the immediate problem, use the Hernand temporary lodgings' Private Storage or the chest inside Kliff's tent at Howling Hill. Those locations and the tent relocation are documented in 1.00.03 and 1.01.00. Follow the inventory guide for the 240-slot bag cap, storage destinations and checks before selling quest items.
Howling Hill Camp
If Old Friend has started after Cheers Echoing From the Edge, go to the alley behind Hernand's inn and approach Marius's group. Continue the following rebuilding objectives instead of making a long optional sweep first. Original Old Friend route.
At the camp, separate a story rebuilding objective from a later expansion mission. Use the camp upgrade guide to read the mission's required members, supplies and completion state. Return to storage after an expansion completes; a mission in progress is not a completed upgrade.
Hernand Castle
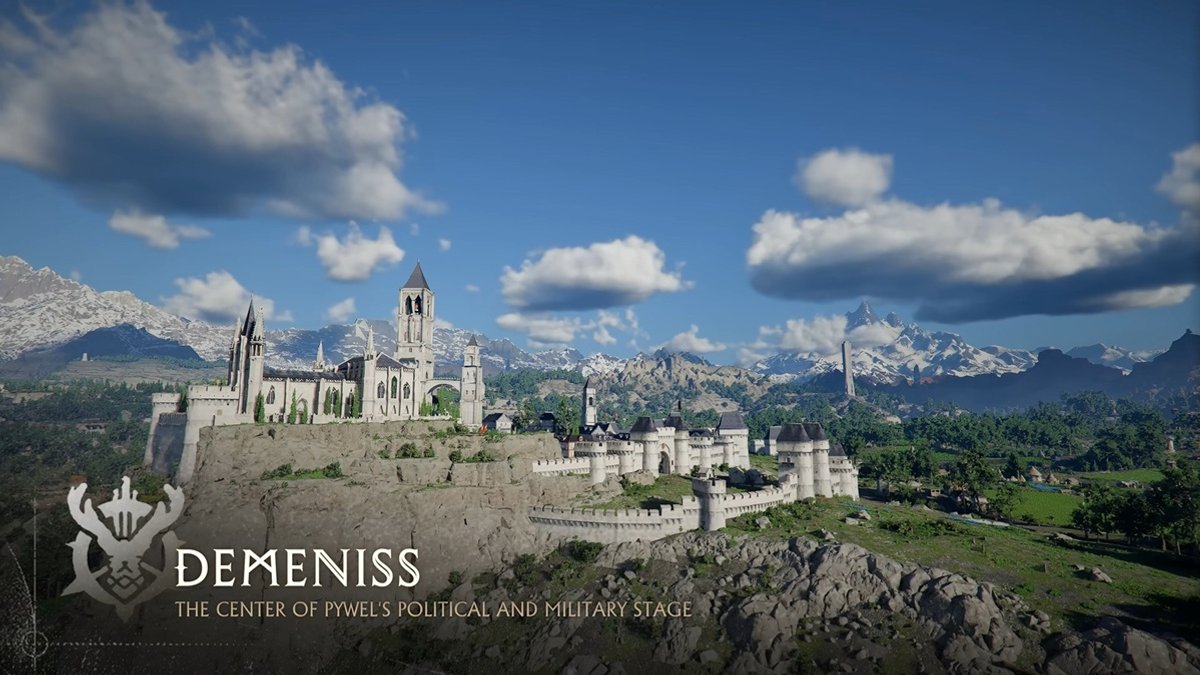
Return here when Demenissian Delegation is your active Chapter 5 objective. The recorded route follows Unwelcomed Guests, takes you to the castle courtyard conversation and then the banquet cutscene that triggers Kearush. Prepare supplies and your loadout before attending. Original banquet route.
Combat and Resource Detours
Karin Quarry
This is the optional House Roberts: Stolen Quarry route involving Marni's Excavatron. The original launch guide places its availability in Chapter 2; choose it when the actual objective is present, rather than assuming it is the next mandatory story fight. Original Excavatron guide.
Before going, open the smithy's refinement preview and identify the materials your chosen upgrade needs. Prepare healing items, activate a nearby return point on the way, and follow the quarry's displayed objectives. Use the crafting and smithing guide for the upgrade check. Reaching the quarry alone does not establish that the quest or liberation is complete.
Mountain of Frozen Souls
Travel here for the Chapter 3 Dance with the Devil objective after Seed of Unease. This is the recorded Reed Devil route. Prepare before entering its marked arena; if you are still on an earlier town or rebuilding step, do that step first. Original quest walkthrough.
River and Forest Detours
Goldleaf Story Route
When Cheers Echoing From the Edge follows Rebellion or Revolution, the original route goes through Hornsplitter's guards to his camp east of Shakatu's. Winning advances into Chapter 3. Follow that active objective instead of searching unrelated forts for Kailok. Original author walkthrough.
Nas River Fishing Dock
The dock is one starting point for Rumor-Ridden Fishing Village when that Vellua guild chain is available. Listen to the story there, then speak to the villager at Forentin Lodge before heading to the coast. The original route also allows starting with that lodge conversation. Original Vellua walkthrough.
You can pair the visit with your planned food preparation, but take the tools and ingredients the activity actually needs. The cooking guide helps choose meals for the next outing.
Pororin Village
Treat access as a faction step. The author of The Unreachable Village records gaining the quest after being taken to a camp by hostile Shai and accepting Young Monk's Request. That is an observed route, not proof that every save requires the same sequence.
If The Unreachable Village is active, talk to Arkin, follow the marked destination using roads rather than repeatedly entering the hostile forest, and retrieve the Relic of Pororin from the walking tree. Continue the subsequent access objective. An unsuccessful walk into the village is a reason to resolve that quest step, not to repeat the same approach.
Academy and Recruitment Routes
Scholastone Institute
For the Chapter 4 Scholastone objective after The Words of Alustin:
- Visit the marked fence in Hernand and obtain the quest outfit.
- Travel to the marked institute approach.
- Equip the Scholastone Uniform before speaking with the guide by the stone pyramid.
- Follow the guide, then continue toward the institute when the objective changes.
This outfit check fixes a specific missing-interaction problem in the original Scholastone walkthrough. Follow your current route prompts around the terrain; do not assume an old climbing shortcut is required. When you reach the institute, the pagoda bell can be added to this trip.
Southern Quarry Recruitment
For A Rumor in the Southern Quarry, finish A Rumor at the Goldleaf Trading Post first. The recorded recruitment route heads east from Howling Hill along the river to the village, then talks to Ashton at the ritual altar. Original recruitment walkthrough.
Use that objective to find comrades. It should not be substituted for a separate quarry liberation or a Cubewalker boss unlock merely because the location names sound similar.
Calphade Bell
Add the church bell to a northern trip when the interaction is available. The March bell walkthrough records it as unavailable during Chapter 6's hostile period, with access before or afterward. If the expected bell scene does not start while the area is hostile, return after the story state changes instead of making repeated climbs. Original bell walkthrough.
Vellua
The author of Beyond the Silent Waves received the guild chain after House Serkis: Secret of the Lost Seal. With Rumor-Ridden Fishing Village active, use the dock/Forentin Lodge route above before entering the village.
Then follow the liberation's separate objectives: stop pirate harassment, rescue the villagers, and deal with Sir Catfish when the chain reaches Shadows in the Mist. Finish the return conversation with the chief. An enemy encounter or a visit to the village is not the whole quest chain.
Choosing Other Optional Detours
For a fort, ruin or frontier marker outside the routes above, give the trip a concrete purpose before leaving town:
- Choose an unlocked objective or a specific material you need. Check its named predecessor and item requirement.
- Plan a return point and supplies. Use a Nexus on the route, carry the next activity's tools and food, and leave room for loot.
- Check the completion signal. A liberation, a rescued NPC and a boss fight can be separate objectives; wait for the actual task completion.
- Pin an unavailable detour for later. Continue the town, camp or academy route that is already actionable.
For a longer ride, check the mount you can actually summon and its travel controls in the mounts and travel guide before choosing a distant marker. A mount's availability does not complete the destination's quest prerequisite.
This is an optional planning branch, not a requirement to clear every marker before continuing the story.
Toll of Pywel Bells in Hernand
The original bell walkthrough supplies three useful Hernand-area stops:
| Bell | Landmark | Add it to this trip |
|---|---|---|
| Hernand | Northern town clocktower | Town introduction or supply return |
| Scholastone | Pagoda at the end of the institute garden | Academy visit |
| Calphade | Church bell in the northern area | When the bell interaction is available; the March record excludes Chapter 6's hostile period |
Original bell locations. A revealed map and an activated travel point are separate checks.
Selected Hernand Boss Routes
Use the quest names to identify the encounter you are pursuing. The selection below supports the routes in this guide; it does not claim a complete current regional total.
Main Quest Bosses
| Encounter | Recorded objective | Route condition |
|---|---|---|
| Kailok / Hornsplitter | Cheers Echoing From the Edge, Chapter 2 | After Rebellion or Revolution |
| Reed Devil | Dance with the Devil, Chapter 3 | After Seed of Unease |
| Kearush the Slayer | Demenissian Delegation, Chapter 5 | After Unwelcomed Guests |
The original Kailok, Reed Devil and Kearush walkthroughs establish those quest associations.
Optional, Faction & World Bosses
Marni's Excavatron belongs to the Karin Quarry Stolen Quarry detour; Sir Catfish appears in Vellua's Beyond the Silent Waves chain. Use their actual quest progress to choose the trip. A world encounter or a later rematch should not be counted as another prerequisite for the same early-region route.
Main-Quest Boss Spotlights
Myurdin in the Prologue
The original In Ashes walkthrough records the same following cutscene whether Myurdin is defeated or not. Treat that sequence as story introduction; do not make “beat the tutorial Myurdin” a region-completion goal. The prologue also shares its quest name with a different Chapter 6 mission. Original prologue walkthrough.
Kailok: Prepare for the Active Goldleaf Objective
Return to town for your planned upgrades and food if you are struggling, then go back to Cheers Echoing From the Edge. Finishing this fight leads into the Marius/Howling Hill route above. Choose a skill or refinement purchase for the problem you are having; the Abyss Artifacts guide helps check skill-related item uses.
Reed Devil (Mountain of Frozen Souls)
When the fight changes into its scarecrow phase, deal with the marked scarecrows rather than continuing the same attack routine on the boss. That phase objective is demonstrated in the original Dance with the Devil walkthrough. Restore your supplies and review your defense if repeated attempts are failing; no fixed food count or refinement level is imposed by this route.
Kearush: Prepare Before the Banquet
The banquet is the trigger on this route. Before attending, select healing items for quick use and check your chosen armor and weapon upgrades. After an unsuccessful attempt, use the town return loop to resupply before trying again. Continue to the Kearush guide for the encounter's combat discussion.
Hernand Exploration Checklist
Before following a new story destination:
- Confirm a usable town or camp return point.
- Ring the bells that are available along the trip you are actually taking.
- Finish the selected commission's handover or the current camp mission's completion step.
- Keep active quest items; move reserves into appropriate storage.
- Check your next route's outfit, tools, healing items and predecessor quest.
- Pin unavailable optional detours rather than counting them as completed.
- Keep the next main-story objective active.
Travel and story unlocks are different things. Follow the story when it sends you elsewhere and return for a useful unfinished task. The official 1.03.00 notes explicitly reference Pailune's liberation in Chapter 7; that does not establish a mandatory tour through every region or every Hernand boss first.
Frequently Asked Questions
What bosses are in the Hernand region in Crimson Desert?
The selected story routes here cover Kailok in Cheers Echoing From the Edge, Reed Devil in Dance with the Devil, and Kearush in Demenissian Delegation. Optional routes include Marni's Excavatron at Karin Quarry and Sir Catfish in the Vellua guild chain. Choose by the quest you have unlocked; these examples are not a complete current regional census.
Do I need to defeat every optional Hernand boss before leaving?
You do not need a complete boss checklist to use this route plan. Follow the active story objective, establish a return point, prepare your loadout and storage, and finish the optional task you actually want to pursue. A new story destination is not a reason to force every distant encounter into one trip.
How do you explore the Hernand region in Crimson Desert?
Start with Hernand town's active tavern objective, the northern clocktower bell and a usable Abyss Nexus. Add a local commission only when its poster is available. Return for the Chapter 3 camp chain, use the required uniform on the Scholastone route, and choose farther detours by their named prerequisites.
Where is Kearush the Slayer in Crimson Desert?
The Chapter 5 Demenissian Delegation quest leads you to the banquet at Hernand Castle and triggers Kearush after the cutscene. The original walkthrough lists Unwelcomed Guests as its prerequisite. Go through that story objective rather than treating a visit to the castle as a free-standing boss unlock.
Why is a Hernand location or quest unavailable?
Check the specific condition for that route: a visible commission poster, a completed predecessor quest, required clothing, or a non-hostile bell interaction. The Scholastone route uses the Scholastone Uniform; Pororin and Vellua have their own faction steps. Finish the missing step instead of repeatedly visiting the destination.
What should I finish in Hernand before moving on?
Activate a useful return point, ring the bells that are available on your route, organize your carried items and storage, and complete the camp or commission step you chose. Keep the next story objective active. This plan does not require a fixed number of commissions or a full optional-boss sweep before travel.
What chapters does Hernand cover, and what region comes next?
Hernand appears throughout early story routes: the Chapter 1 town introduction, Chapter 3 camp rebuilding, Chapter 4 Scholastone and the Chapter 5 castle banquet are useful waypoints. Follow the next main-story objective for travel; the official notes place Pailune's liberation in Chapter 7. There is no single region order imposed by this checklist.
Related Guides
- Camp upgrades and expansion missions — carry the Howling Hill route into a completed expansion.
- Inventory and storage — free space while preserving quest and upgrade items.
- Abyss Artifacts — check skill-item uses before spending or discarding them.
- Crafting and smithing — plan an upgrade before a material detour.
- Cooking and food — prepare for the next outing.
- Pailune boss routes and rematches — use the relevant story/encounter conditions when that region becomes your objective.
Change Log
October 3, 2026: replaced the promised full-region sweep with progress-based town, camp, academy and faction routes; added specific commission and access conditions; removed unverified boss totals, the “27 Hernand” count, guaranteed inventory payouts and a fixed region order; corrected the Southern Quarry recruitment route and prologue wording. Original publication date, page URL and old section links retained.
Author

An editorial pen name used for gameplay walkthroughs tested or researched by the Crimson Desert HQ team; it is not the in-game character or a Pearl Abyss representative.
Editorial standards
We prioritize official sources, reproducible game evidence, and clearly labeled community reports. Found an error or missing attribution?
Read our editorial policyCategories
Table of Contents
More Guides
Best Side Quests in Crimson Desert: Camp & Town Routes
Choose an available Crimson Desert side quest by your goal: town commissions, camp work or a faction detour. Check prerequisites and rewards before traveling.

Crimson Desert Camp Upgrade Guide: Levels 1-5, Materials & Unlocks
Follow the Camp Expansion route through Levels 1-5, check your live material and recruit requirements, and troubleshoot a missing Level 4 mission.
Crimson Desert Mounts: Horses & Confirmed Animal Rewards
Learn the official animal-mount names, horse controls and cloudcart update rules, then check your save's unlocks before planning your next Crimson Desert trip.

Newsletter
Join the community
Subscribe to our newsletter for the latest news and updates